DIY vs. Pro Repair Decision Tool
Is your oven acting up?
Answer 3 simple questions to find out if you should attempt a DIY fix or call a professional technician.
Question goes here
There is nothing quite as frustrating as opening your electric oven a kitchen appliance designed for baking and roasting using electrical resistance heating only to find it isn't heating up. You have dinner plans, a cake in the mix, or just a simple roast chicken waiting, and suddenly your kitchen centerpiece has decided to take a permanent nap. The immediate question that pops into your head is usually: "Can I fix this myself, or do I need to call a professional?"
The short answer is: it depends entirely on what broke. Some issues are so simple that you can resolve them with a screwdriver and ten minutes of effort. Others involve high-voltage electricity and complex control boards that require certified expertise. Misjudging the difficulty can lead to wasted money, further damage, or even serious safety hazards like electrical shocks or fires.
Understanding the Anatomy of an Electric Oven
Before you decide whether to tackle the repair yourself, you need to understand what you are dealing with. An electric oven is not a single monolithic unit; it is a collection of distinct components working together. Knowing which part is likely failing helps you gauge the complexity of the job.
The most common points of failure include:
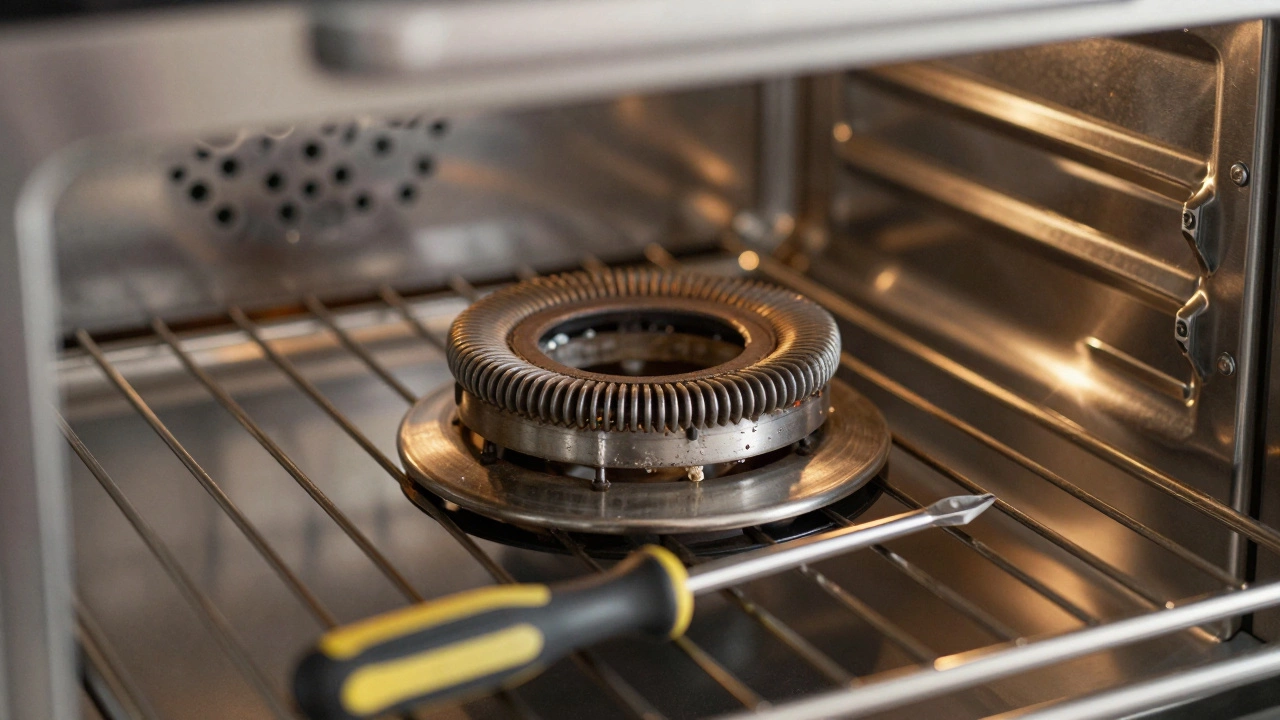
- Heating Elements: These are the metal coils at the bottom (bake) and top (broil) of the oven. They glow red hot when working. If they look blistered, broken, or don't glow at all, they are likely dead.
- Thermal Fuse: This is a safety device that cuts power if the oven gets too hot. It is often located near the back wall of the oven cavity.
- Temperature Sensor: A small probe that tells the control board how hot the inside of the oven is. If this fails, the oven might overheat or never reach the set temperature.
- Control Board: The brain of the oven. It manages the timer, temperature settings, and signals to the heating elements. These are expensive and complex to replace.
- Door Switches: Small buttons or levers that tell the oven the door is closed so it can start heating.
If the problem lies with the first three items, you are looking at a relatively easy fix. If it involves the control board or wiring harnesses, the difficulty level spikes significantly.
When DIY Makes Sense: The Easy Fixes
Many oven repairs are surprisingly straightforward because manufacturers design these parts to be user-replaceable. The goal here is to save you the cost of a service call, which in Dunedin and much of New Zealand can range from $100 to $150 just for the visit, plus parts and labor.
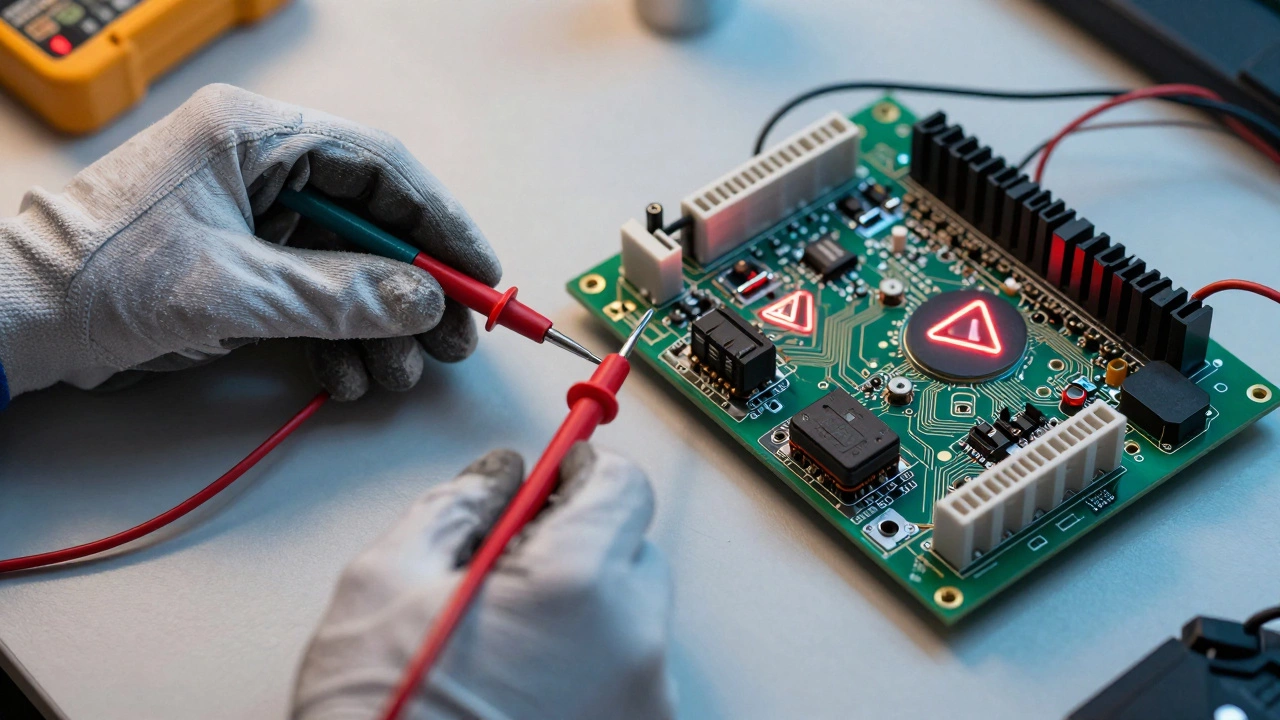
Replacing a Heating Element This is the most common DIY repair. If your oven isn't heating, check the element visually. Look for cracks, holes, or blisters. If the element looks intact but still doesn't work, you will need a multimeter to test for continuity. Assuming it is bad, the replacement process usually involves:
- Turning off the power at the circuit breaker. Never skip this step.
- Removing the two screws holding the element to the back wall of the oven.
- Disconnecting the wires from the terminals.
- Installing the new element by reversing the steps.
Checking the Thermal Fuse If the oven has no power at all-no lights, no display-the thermal fuse might have blown. This is a one-time use fuse. You locate it, remove it, and test it with a multimeter for continuity. If there is no continuity, you replace it. The part itself is cheap, often under $20, but finding the right model number is crucial.
Cleaning the Temperature Sensor Sometimes the issue isn't a broken part but a dirty one. Grease and food debris can coat the temperature sensor, causing inaccurate readings. Wiping it down with a soft cloth and mild detergent can sometimes restore proper function without any part replacement.
When to Call a Professional: The Hard Fixes
Not every problem is a simple swap-out. Some repairs require specialized knowledge, tools, and certification. Attempting these yourself can void warranties, create fire hazards, or result in electrocution.
Control Board Issues If your oven displays error codes, acts erratically, or has multiple failures simultaneously, the control board is likely the culprit. Replacing a control board involves removing the entire back panel of the oven, disconnecting numerous wire harnesses, and programming the new board. One wrong connection can fry other components. Plus, these boards can cost $200-$400. It is often worth paying a technician to ensure it is installed correctly.
Gas Oven Repairs While our focus is electric ovens, it is worth noting that gas ovens add another layer of danger. Gas leaks can be fatal. Any repair involving the gas valve, igniter, or gas line should always be handled by a licensed gas fitter. In New Zealand, strict regulations govern gas appliance repairs for safety reasons.
Wiring Harness Damage If you see burnt wires, melted insulation, or signs of arcing, stop immediately. This indicates a deeper electrical fault. Tracing and repairing wiring requires experience with low-voltage and high-voltage systems. A professional can diagnose why the wiring failed in the first place, preventing recurrence.
| Factor | DIY Repair | Professional Repair |
|---|---|---|
| Cost | $20 - $100 (parts only) | $150 - $400+ (labor + parts) |
| Time Required | 1 - 2 hours | 1 - 3 days (scheduling + repair) |
| Skill Level | Basic handyman skills | Certified technician |
| Risk | High (if unqualified) | Low (insured & trained) |
| Warranty Impact | May void warranty | Often preserves warranty |
Safety First: Essential Precautions
If you decide to proceed with a DIY repair, safety must be your top priority. Electricity does not care about your good intentions. Here are non-negotiable rules:
- Disconnect Power: Always turn off the circuit breaker that supplies power to the oven. Do not rely on the oven's own switch. Verify the power is off using a voltage tester.
- Use Proper Tools: Invest in a good quality multimeter. Cheap ones can give false readings, leading to dangerous mistakes. Insulated screwdrivers are also recommended.
- Work in a Dry Environment: Never work on appliances with wet hands or in a damp area. Water conducts electricity and increases shock risk.
- Follow Instructions: Download the service manual for your specific oven model. Manufacturers provide detailed diagrams and procedures. Ignoring these can lead to improper reassembly.

Cost-Benefit Analysis: Is It Worth It?
Before starting any repair, consider the age and condition of your oven. If your oven is more than 10 years old, it might be nearing the end of its lifespan. Spending $150 on a new control board for a decade-old appliance might not make financial sense. In such cases, replacing the entire oven could be a better investment, offering improved energy efficiency and features.
However, if your oven is relatively new (under 5 years), repairing it is almost always the smarter choice. Modern ovens are built to last, and a single faulty component shouldn't dictate the death of the whole machine. Additionally, repairing extends the life of your appliance, reducing electronic waste-a growing concern in environmental circles.
In Dunedin, where winters are cold and hearty meals are a staple, having a reliable oven is crucial. A quick DIY fix can get you back to cooking stews and roasts in no time. But knowing when to step back and call a pro ensures you stay safe and avoid costly mistakes.
Troubleshooting Common Symptoms
To help you diagnose the issue before deciding on a repair path, here is a quick guide to common symptoms:
- Oven won't heat at all: Check the thermal fuse, then the heating elements. If those are fine, suspect the control board or wiring.
- Oven overheats: Likely a faulty temperature sensor or control board. The oven isn't getting the signal to stop heating.
- Oven takes forever to preheat: Could be a weak heating element or a blocked vent. Clean the vents and test the element.
- Error codes on display: Consult your owner's manual. Codes like F95 or E06 often point to specific sensor or board issues. Searching the code online can give you precise diagnostic steps.
How much does it cost to repair an electric oven?
The cost varies widely depending on the part and labor. Simple parts like heating elements cost $30-$80 and can be DIYed for free labor. Professional repairs typically range from $150 to $400, including diagnosis and labor. Complex issues involving control boards can push costs higher.
Is it safe to repair an oven yourself?
It is safe if you follow strict safety protocols, primarily disconnecting power at the circuit breaker and using insulated tools. However, if you are uncomfortable with electricity or the repair involves gas lines or complex electronics, it is safer to hire a professional.
What are the most common oven problems?
The most frequent issues are failed heating elements, blown thermal fuses, and malfunctioning temperature sensors. These account for the majority of oven repair calls. Control board failures are less common but more expensive to fix.
How long does an oven heating element last?
A typical electric oven heating element lasts between 5 to 10 years, depending on usage frequency and maintenance. Signs of wear include blistering, discoloration, or visible breaks in the coil.
Should I replace my oven or repair it?
If the repair cost exceeds 50% of the price of a new oven, or if the oven is over 10 years old, replacement is often more economical. For newer ovens, repairing individual components is usually the best financial decision.