DIY Extractor Fan Guide: Replace, Service & Tips
If your kitchen or bathroom fan is noisy, weak, or stopped working, you don’t have to wait for a technician. With a few tools and basic safety steps, you can replace or service an extractor fan yourself. This guide walks you through the whole process, from spotting the problem to getting the fan humming again.
When to Fix It Yourself
First, decide if the job is a good fit for DIY. Most extractor fans are mounted on the wall or ceiling and connect to a simple electrical cable. If the fan is just clogged with dust, the fix is a quick clean. If the motor is humming but not turning, a simple bearing lubrication or belt replacement might do the trick. Only call a professional if you see burnt wiring, a cracked housing, or if the fan is hard‑wired to a circuit breaker you’re not comfortable handling.
Tools & Materials You’ll Need
- Screwdriver set (Phillips and flat‑head)
- Adjustable wrench
- Voltage tester
- Vacuum with brush attachment
- New extractor fan (same size and airflow rating)
- Silicone sealant (optional for ceiling fans)
Having these items on hand saves you time and stops you from mid‑job trips to the hardware store.
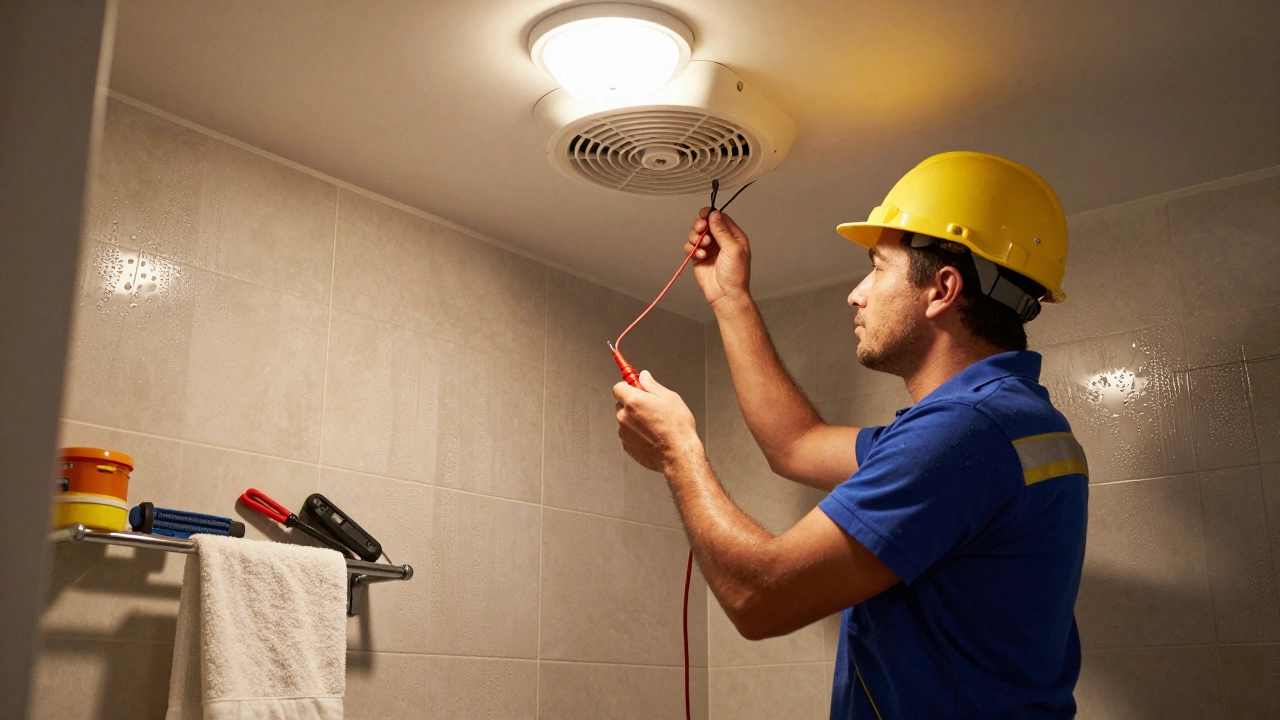
Step 1: Turn Off Power
Locate the circuit breaker that controls the fan and flip it off. Use a voltage tester on the fan’s wires to confirm there’s no live electricity. Safety first – never work on a live circuit.
Step 2: Remove the Old Fan
Most fans are secured with two or three screws. Unscrew the cover, then disconnect the wiring – usually a black (live), white (neutral), and green or bare (ground) wire. Take a photo of the connections so you can match them later.
Step 3: Clean the Ductwork
While the fan is out, inspect the duct that carries air outside. Dust, lint, and cobwebs can reduce performance. Use the vacuum brush to clean the inside of the duct and the fan housing. A clean duct means the new fan will run more efficiently.
Step 4: Install the New Fan
Fit the new fan into the mounting bracket. If you’re using a ceiling fan, apply a thin bead of silicone around the edge before tightening the screws – this stops drafts. Re‑connect the wires following the photo you took earlier or the standard color code: black to black, white to white, ground to ground.
Step 5: Test the Fan
Turn the breaker back on and switch the fan on. Listen for smooth operation and feel the airflow. If it’s still noisy or doesn’t spin, double‑check the wiring and make sure the motor isn’t jammed.
Step 6: Secure the Cover
Place the cover back on and tighten the screws. Clean any dust that settled during installation. Your fan should now be quiet, efficient, and ready for daily use.
Even if the fan works after you replace it, regular maintenance keeps it humming. Every 6‑12 months, turn off power, remove the cover, and vacuum the blades and ducts. This simple habit stops grease buildup and extends the fan’s life.
Remember, the biggest cost saver is catching problems early. If you notice a drop in airflow, a rattling sound, or the fan cycling on and off, address it right away. A quick clean or a spare motor can avoid a full replacement later.
When you’re unsure, don’t hesitate to call a professional. A licensed electrician can safely handle hard‑wired fans and ensure everything meets local codes. But for most standard wall‑mounted or ceiling fans, the steps above give you the confidence to get the job done yourself – fast, cheap, and without the waiting game.
Feb 23, 2026
Do I Need an Electrician to Replace an Extractor Fan?
0 Comments
Replacing an extractor fan isn't always a simple DIY job. In New Zealand, wired fans require a licensed electrician for safety and legal reasons. Learn when you can do it yourself and when you absolutely shouldn't.
Read MoreApr 4, 2025

Are Extractor Fans Easy to Replace?
0 Comments
Extractor fans are essential for keeping your kitchen or bathroom fresh and odor-free. Whether your fan is broken or you're upgrading, replacing it doesn't have to be daunting. Understanding the basics of electricity and having some handy skills can make the process go smoothly. This guide offers practical tips and insights into replacing an extractor fan safely and effectively.
Read More