Oven Fit Compatibility Calculator
Your Current Oven
Your Cabinet Cavity
Compatibility Results
Replacing an electric oven isn’t as scary as it sounds - but it’s not a simple swap either. If you’ve ever tried to pull out an old oven and stared at the wires, the gas line (even though it’s electric), or the stubborn screws holding it in place, you know it’s not just about sliding a new box into the cavity. The real question isn’t whether you can do it - it’s whether you should.
What You’re Really Up Against
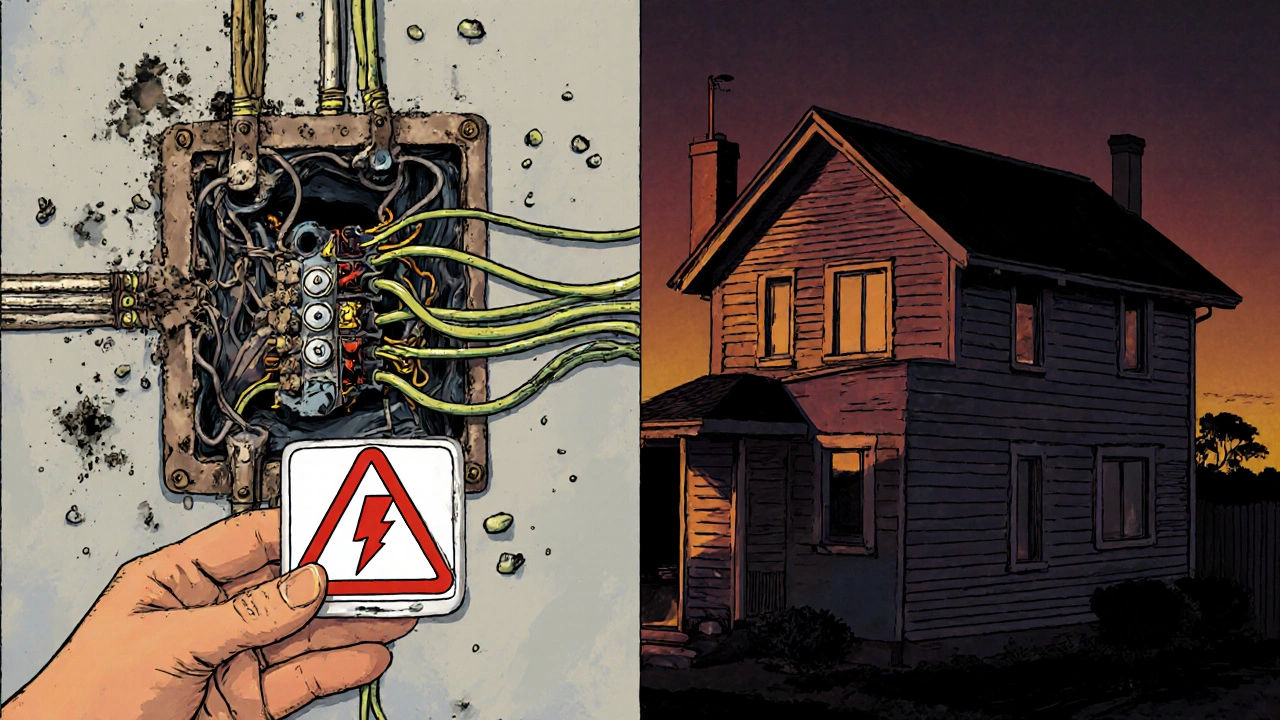
Most people think replacing an electric oven is like changing a lightbulb: turn it off, unplug it, plug in the new one. But electric ovens aren’t plugged in. They’re hardwired. That means there’s no simple outlet. Instead, there’s a dedicated 240-volt circuit running from your breaker panel directly to the back of the oven. This isn’t something you can just yank out with pliers.
Then there’s the fit. Ovens come in standard widths - 60 cm is common in New Zealand - but not all are identical. Your old oven might be 59.5 cm wide, and the new one 60.2 cm. That half-centimeter difference can mean scraping the cabinet sides or forcing the door to stick. Even the depth varies. Some models stick out farther than others, which can mess with your countertop overhang or block the drawer underneath.
And don’t forget the vent. If your oven has a built-in exhaust fan, it might connect to a duct in the wall or cabinet above. Newer models often don’t include this, so you might end up with a hole in your cabinetry you didn’t plan for.
Tools You’ll Actually Need
You don’t need a fancy toolkit, but you do need the right stuff. Here’s what works:
- Socket wrench set (for mounting brackets)
- Flathead and Phillips screwdrivers
- Voltage tester (non-contact is fine)
- Flashlight or headlamp
- Helper (seriously, ovens are heavy)
- Adjustable wrench (for gas lines - even if it’s electric, some models have gas igniters)
- Painter’s tape and masking tape (to mark wire positions)
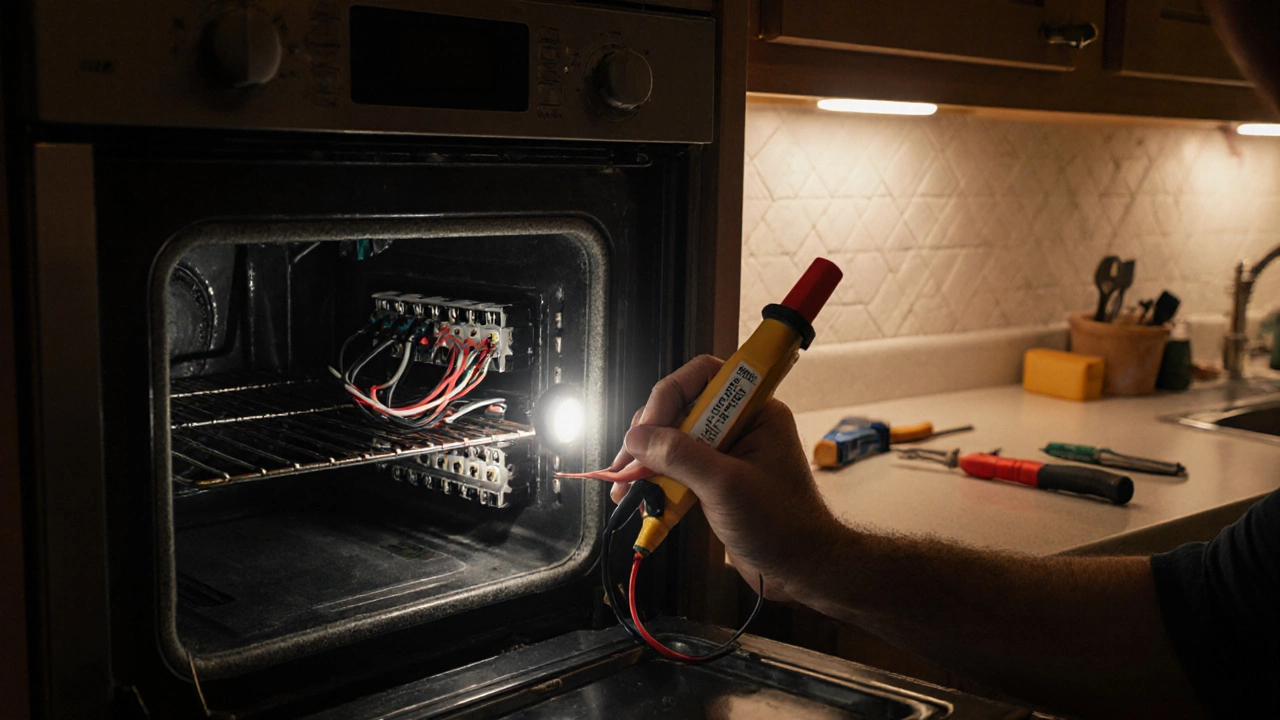
Don’t skip the voltage tester. Even if you turned off the breaker, mistakes happen. Someone else might’ve flipped the wrong switch. Test the wires at the oven’s terminal block before touching anything. A live 240-volt wire can kill you faster than you can say "I thought I turned it off."
Step-by-Step: Pulling Out the Old One
- Turn off the circuit breaker for the oven. Double-check with your voltage tester at the terminal block behind the oven.
- Unplug any accessories - if your oven has a light or clock that runs off a separate 120-volt line, disconnect it too.
- Remove the oven racks and any removable parts inside.
- Open the oven door fully. Most models have a latch or hinge pin that lets you remove the door. Do this now - it makes the oven lighter and easier to maneuver.
- Locate the mounting brackets on either side of the oven cavity. These are usually held by two screws each. Remove them.
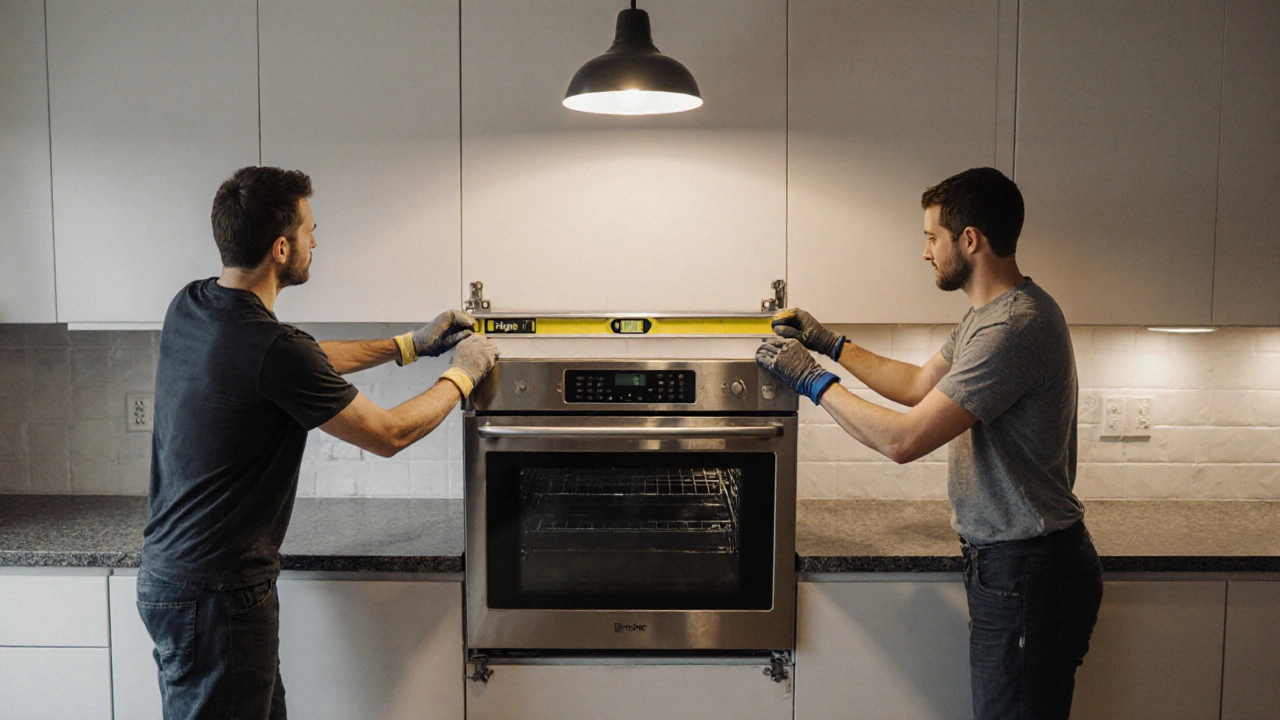
- Have your helper hold the oven steady as you carefully pull it out. Watch for wires, vents, or the floor track. Don’t yank. Slide slowly.
- Once it’s out, label each wire with painter’s tape. There are usually four: two hot (black and red), one neutral (white), and one ground (green or bare copper). Take a photo before disconnecting.
Installing the New Oven
Before you even unbox the new oven, check the manual. Some brands require a specific wire gauge or a dedicated circuit. If your house is older - say, built before 2000 - your wiring might be 10-gauge. Newer ovens often need 8-gauge. If in doubt, call an electrician. This isn’t the place to guess.
Once you’re ready:
- Slide the new oven into place, keeping it level. Use a small spirit level on top.
- Connect the wires exactly as you labeled them. Black to black, red to red, white to white, ground to ground. Tighten the terminal screws firmly - loose connections cause overheating.
- Reattach the mounting brackets. Most ovens come with brackets already installed. If not, attach them to the sides of the oven before sliding it in.
- Reinstall the oven door. Check that it opens and closes smoothly. If it’s rubbing, the oven isn’t level.
- Turn the breaker back on. Test the oven: set it to bake at 180°C. Wait 10 minutes. If the heating element glows red and the fan runs, you’re good.
When to Call a Pro
You don’t need to be an electrician to replace an oven - but you do need to respect electricity. Here’s when to stop and call someone:
- Your breaker panel is full - you can’t add a new circuit.
- The wiring looks frayed, corroded, or smells like burning plastic.
- You’re unsure about the voltage requirements (some ovens are 208V, others 240V).
- The oven doesn’t fit properly and you’d need to cut into cabinetry or flooring.
- You’re uncomfortable working near live wires, even after turning off the breaker.
In Dunedin, where homes range from 1920s weatherboard cottages to modern builds, wiring standards vary wildly. If your house was built before 1990, there’s a good chance your oven circuit isn’t up to current code. A licensed electrician can check this in under an hour.
Costs You Can’t Ignore
Electric ovens range from $600 to $2,500 depending on features. But the hidden cost? Labor. If you hire someone to remove the old one and install the new one, expect to pay between $200 and $400. That includes:
- Removing and disposing of the old oven
- Checking and upgrading wiring if needed
- Ensuring the new oven is level and securely mounted
- Testing all functions
DIY saves you $300 - but if you mess up the wiring, you could fry the oven, trip the breaker repeatedly, or worse, start a fire. Insurance claims for electrical fires often get denied if the work wasn’t done by a licensed person.
Common Mistakes (And How to Avoid Them)
Here’s what most people get wrong:
- Skipping the voltage test - Always test. Always.
- Forgetting to remove the door - Makes the oven 15kg heavier and harder to control.
- Not checking the depth - Some ovens stick out past the countertop. That’s fine if you know it’s coming.
- Using the wrong screws - Mounting brackets need 6mm or 1/4-inch screws. Don’t use drywall anchors.
- Ignoring the ground wire - That bare copper wire isn’t optional. It’s your safety net.
One guy in Dunedin tried to reuse the old mounting brackets. The new oven was heavier. After three months, the brackets bent, and the oven tilted forward. He had to call a repair tech - and paid twice as much as if he’d just bought new brackets upfront.
What to Look for in a New Oven
Not all electric ovens are made equal. Here’s what to check before buying:
- Width and depth - Measure your cavity. Write it down. Don’t guess.
- Power requirements - Look for "240V, 3.5kW" or similar. Match it to your circuit.
- Installation type - Built-in? Slide-in? Freestanding? Your cabinetry determines this.
- Warranty - At least 2 years on parts, 1 on labor. Avoid no-name brands.
- Self-cleaning - If you hate scrubbing, yes. If you’re on a budget, maybe skip it.
Brands like Bosch, Siemens, and Smeg are common in New Zealand and have reliable support networks. Avoid bargain-bin ovens from unknown online sellers - if it breaks, there’s no one to call.
Final Thought: Is It Worth It?
Replacing an electric oven is doable if you’re calm, careful, and have a helper. But it’s not a weekend project for someone who’s never touched a screwdriver. If you’re not 100% confident, hire a pro. The cost of a mistake - a damaged oven, a tripped breaker, or a fire - isn’t worth saving $300.
And if your oven is over 12 years old? It’s probably using 20% more power than a new one. Replacing it isn’t just about convenience - it’s about saving money on your electricity bill over time.
Can I replace my electric oven myself?
Yes, if you’re comfortable working with 240-volt wiring, have a helper, and can follow the steps carefully. But if you’re unsure about the electrical setup, the fit, or the wiring labels, it’s safer to hire a licensed electrician or appliance technician.
Do I need a permit to replace an electric oven?
In New Zealand, you don’t need a permit to replace an oven like-for-like. But if you’re changing the circuit, upgrading the wiring, or moving the oven location, a licensed electrician must do the work and certify it. DIY on high-voltage circuits can void your home insurance.
How long does replacing an electric oven take?
For someone with experience, it takes 1.5 to 2 hours. For a first-timer, plan for 3 to 4 hours. The hardest part is usually disconnecting and reconnecting the wires safely. Don’t rush - mistakes happen when you’re in a hurry.
What if my new oven doesn’t fit in the old space?
Measure your cavity before buying. If the new oven is too wide, you may need to trim the cabinet sides - but only if they’re made of particleboard or MDF. Solid timber or stone surrounds can’t be easily cut. If it’s too deep, you might need to adjust the floor or move the wall outlet. In many cases, it’s easier to choose a different model.
Why is my new oven not heating up after installation?
Most likely, one of the two live wires (black or red) isn’t connected properly. Check the terminal block. Also, make sure the circuit breaker is fully turned on - sometimes it looks like it’s on but is actually tripped halfway. If everything looks right, the oven’s heating element may be faulty - contact the manufacturer.